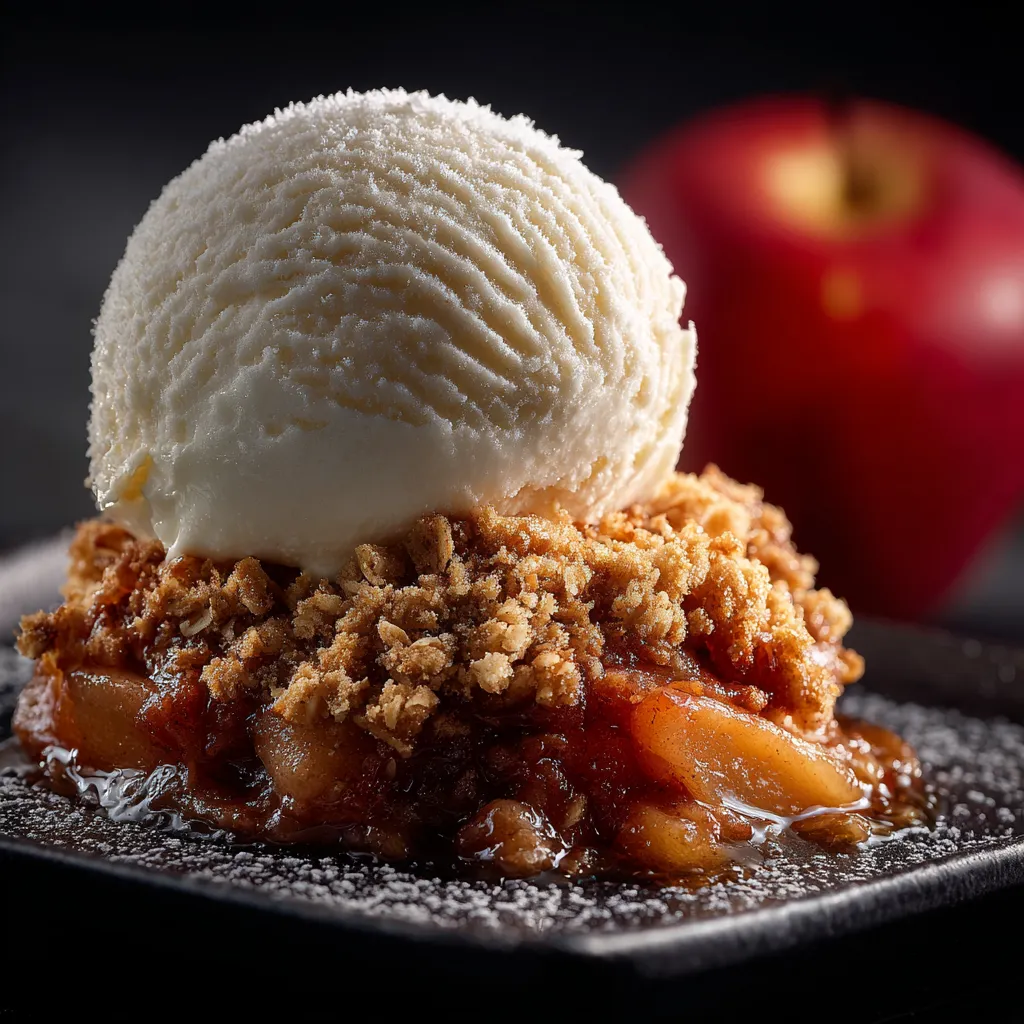
Apple Crisp is the quintessential autumn dessert, a delightful symphony of tender, spiced apples crowned with a buttery, crispy oat topping. As the leaves begin to change and a chill fills the air, there’s truly nothing more comforting than a warm slice of this classic treat. This recipe promises an authentic experience, capturing the essence of fall in every spoonful.
Many home bakers often wonder, what type of apples are best for apple crisp? The key is to choose firm, crisp apples that hold their shape well during baking, such as Granny Smith for a tart kick, Honeycrisp for balanced sweetness, or Fuji for a subtle floral note. Combining different varieties can also create a more complex flavor profile, ensuring your apple crisp is perfectly balanced and utterly irresistible. This guide will walk you through creating a truly unforgettable dessert that will become a cherished part of your seasonal traditions.
Table of Contents
My earliest memories of Apple Crisp trace back to my grandmother’s kitchen, where the aroma of cinnamon and baked apples filled the house every October. She believed that the secret to a truly great apple crisp wasn’t just in the apples, but in the love baked into every crumble. I vividly recall watching her meticulously peel and slice apples, her hands moving with a practiced grace that only years of baking can bestow. The bubbling sound from the oven, followed by the sight of that golden-brown, glistening topping, was pure magic.
It was a dish that celebrated the harvest, brought family together, and warmed you from the inside out. This recipe is a homage to those cherished moments, a way to recreate that comforting magic in your own home. It’s also often asked, why is my apple crisp topping not crispy? The answer often lies in the butter and sugar ratios, as well as the baking temperature. Ensuring cold butter is cut into the dry ingredients and baked at a sufficient temperature allows for proper caramelization and crisping.
Why You’ll Love This
- Classic Comfort: This Apple Crisp recipe delivers the ultimate nostalgic autumn flavor.
- Easy to Make: Simple ingredients and straightforward steps make this accessible for all skill levels.
- Crowd-Pleaser: Perfect for gatherings, holidays, or a cozy night in.
- Versatile: Delicious on its own or paired with ice cream, whipped cream, or custard.
💡 Try This Next: If you loved this, try yumytasty.com.
What Makes Apple Crisp Special
What truly elevates Apple Crisp beyond a simple dessert is its harmonious blend of textures and flavors. The tender, juicy apples, sweetened and spiced just right, provide a soft contrast to the crunchy, buttery oat topping. This delightful interplay makes each bite an experience. Unlike a pie, an apple crisp offers a more rustic and often quicker preparation, making it a favorite for spontaneous baking.
Its appeal lies in its simplicity and the ability to highlight the natural sweetness and tartness of seasonal apples. There’s an inherent warmth and coziness associated with an apple crisp that few other desserts can match, instantly evoking feelings of home and comfort. It’s a dish that celebrates the bounty of the apple harvest, transformed into something truly extraordinary with minimal fuss.
Key Ingredients for Apple Crisp
- Apples: As mentioned, firm baking apples like Granny Smith, Honeycrisp, Fuji, Gala, or a mix, are ideal. Granny Smiths provide tartness, balancing the sweetness of the crisp.
- Flour: All-purpose flour is used for both thickening the apple filling and creating the structure of the crisp topping.
- Sugars: Granulated sugar sweetens the apples, while brown sugar in the topping adds moisture, depth, and a hint of molasses flavor.
- Oats: Old-fashioned rolled oats are crucial for that signature chewy, crispy texture in the topping. Instant oats are too fine and won’t give the same result.
- Butter: Unsalted, cold butter is essential for the topping to achieve that crumbly, crisp texture. It prevents the topping from becoming greasy and helps it brown beautifully.
- Spices: Cinnamon and nutmeg are classic pairings with apples, enhancing their natural sweetness and providing a warm, aromatic profile.
- Lemon Juice: A splash of lemon juice prevents the apples from browning too quickly and brightens their flavor, adding a touch of essential acidity.
How to Make Apple Crisp: Step-by-Step
- Step 1: Prep the Apples.
- Begin by peeling, coring, and slicing your apples into uniform 1/4-inch pieces. This ensures even cooking. In a large bowl, toss the apples with granulated sugar, a tablespoon of all-purpose flour, cinnamon, nutmeg, and fresh lemon juice. This coating helps thicken the apple juices and prevents oxidation. Transfer the apple mixture to your prepared baking dish.
- Step 2: Craft the Topping.
- In a separate bowl, whisk together the dry ingredients for the crisp: flour, brown sugar, old-fashioned rolled oats, a pinch of cinnamon, and salt. Add the cold, cubed butter. Using your fingers or a pastry blender, work the butter into the dry mixture until it forms coarse crumbs. Avoid overmixing, as you want some variation in crumb size for texture.
- Step 3: Assemble and Bake.
- Evenly sprinkle the prepared crisp topping over the apple layer in the baking dish. Place the dish on a baking sheet to catch any overflow. Bake in a preheated oven at 375°F (190°C) for 35-45 minutes. The topping should be golden brown and the apples tender and bubbly. If you notice the topping browning too quickly, you can gently tent it with aluminum foil. This methodical approach ensures a perfect Apple Crisp every time.
- Step 4: Cool Before Serving.
- Allow the apple crisp to cool for at least 15-20 minutes before serving. This crucial step lets the filling set, preventing it from being too runny when scooped. The brief cooling period also intensifies the flavors. Serve warm for the best experience.
📚 Read More: Get fresh cooking ideas from buzkitchen.com.
Storing Your Apple Crisp
One common question is, can apple crisp be made ahead of time? Yes, you can prepare the apple crisp a day in advance. Store the unbaked crisp, covered tightly with plastic wrap, in the refrigerator. When ready to bake, remove it from the fridge about 30 minutes before baking and then proceed with the normal baking instructions, potentially adding 5-10 minutes to the baking time. As for leftover apple crisp, how do you store it properly? Once cooled, cover the baking dish tightly with plastic wrap or transfer the crisp to an airtight container.
It will keep well at room temperature for up to 2 days. For longer storage, refrigerate for up to 4-5 days. While refrigeration helps preserve it, the topping might lose some of its crispness. You can reheat individual portions in the microwave or a toaster oven for a few minutes until warmed through, which can help restore some of the topping’s texture.
Apple Crisp Variations & Substitutions
This classic Apple Crisp recipe is wonderfully adaptable, allowing for numerous variations to suit your taste or dietary needs. For a different fruit profile, consider adding a cup of berries like blueberries or raspberries to the apple filling, which introduces a lovely tartness and vibrant color. You can also experiment with other fruits entirely, such as peaches, pears, or a combination of fall fruits. To make the crisp gluten-free, substitute all-purpose flour with a 1:1 gluten-free baking blend and ensure your oats are certified gluten-free.
For a dairy-free or vegan version, use a plant-based butter substitute in the topping. You can also enhance the topping by adding chopped nuts like pecans or walnuts for extra crunch and flavor, or a tablespoon of orange zest for a bright, citrusy note. Some prefer a truly decadent crisp, adding a caramel drizzle over the apples before adding the topping. These simple adjustments can transform your Apple Crisp into a truly personalized treat, making it unique and exciting.
Serving Suggestions for Apple Crisp
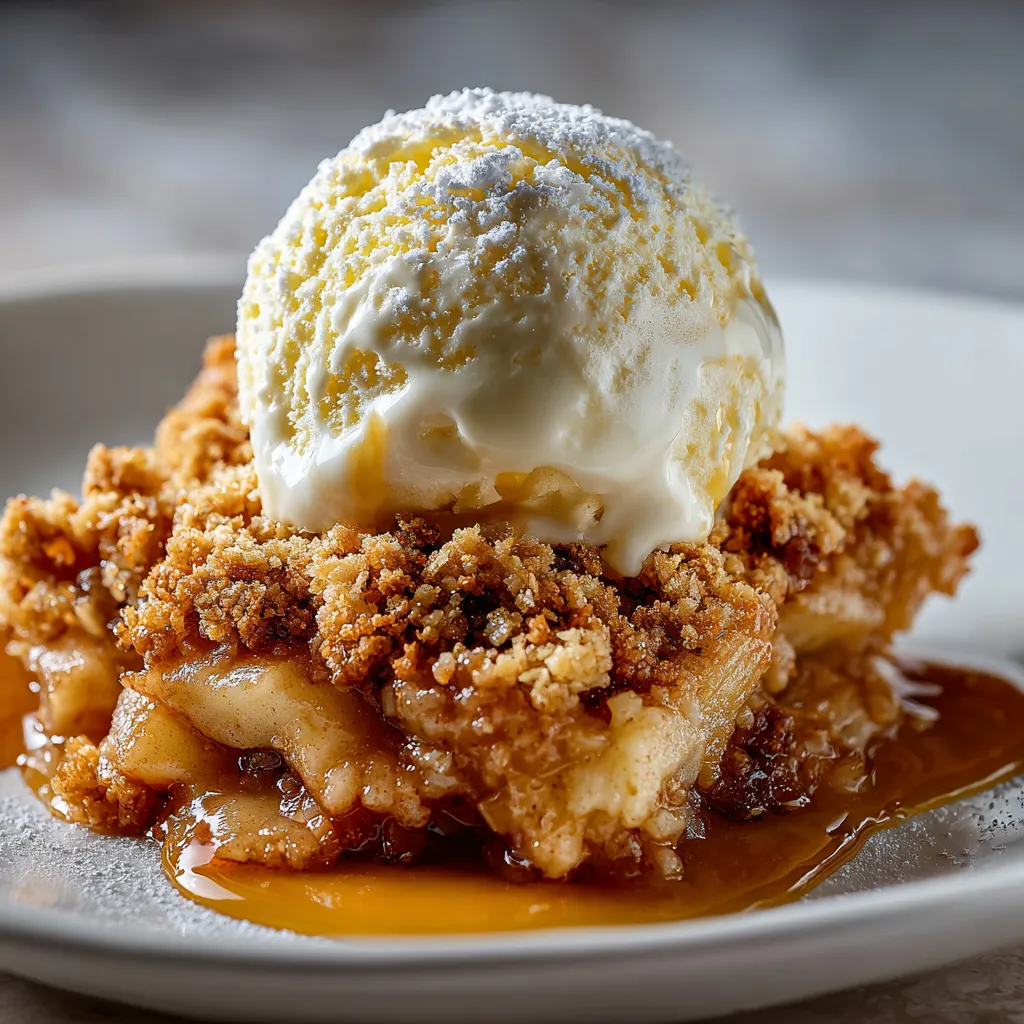
Serving a warm Apple Crisp is an experience in itself, and there are many delightful ways to enhance it. The most classic accompaniment is a scoop of rich vanilla bean ice cream, creating a wonderful contrast between the warm, soft apples and the cold, creamy ice cream. A dollop of freshly whipped cream, perhaps lightly sweetened with a touch of maple syrup, also makes an excellent topping, adding a light and airy texture.
For those who appreciate a tangy counterpoint, a spoonful of crème fraîche or Greek yogurt can balance the sweetness beautifully. A drizzle of homemade caramel sauce or a sprinkle of toasted, chopped nuts like pecans or walnuts can add an extra layer of indulgence and crunch. For a truly autumnal flair, consider serving it with a warm spiced cider or a robust cup of coffee. No matter how you choose to serve it, this Apple Crisp is sure to be a heartwarming delight.
The History of Apple Crisp
The Apple Crisp, much like its close relatives the apple crumble and apple streusel, is a dessert with deep roots in resourceful home baking, particularly popular in North America and Great Britain. While the exact origin is somewhat debated, crisps gained significant popularity during wartime, especially World War I and II. During these periods, ingredients like pie crust pastry (which requires more butter and effort) were often scarce or rationed. The crisp provided a simpler, more economical alternative, using a topping made from butter, flour, sugar, and often oats, which was easier and quicker to assemble.
It offered a comforting and delicious way to utilize abundant fall apple harvests without the complexities of a traditional pie. This practicality, combined with its irresistible taste and ease of preparation, cemented the Apple Crisp’s place as a beloved staple in homes across generations, symbolizing warmth, comfort, and the simple pleasures of autumn.
This delightful Apple Crisp recipe is more than just a dessert; it’s an invitation to savor the flavors and comforts of autumn. With tender, spiced apples and a golden, crumbly topping, it embodies everything wonderful about seasonal baking. Whether you’re making it for a special gathering or a quiet evening at home, this Apple Crisp is sure to bring joy and warmth. Experiment with different apple varieties, spice blends, or toppings to make it uniquely yours. Enjoy the simple pleasure of a homemade classic that truly captures the essence of fall.
Pro Tips
- Don’t Skimp on Apples: Use a generous amount of apples for a full, satisfying filling.
- Cold Butter is Key: Ensure your butter is very cold for the topping; it creates a more crumbly and crisp texture.
- Pre-bake if Needed: If your apples are particularly juicy, you can lightly pre-bake them for 10-15 minutes before adding the topping to reduce excess moisture.
- Resting Time: Allow the crisp to rest after baking. This allows the juices to thicken and prevents a runny filling.
- Spice it Up: Don’t be afraid to experiment with other spices like a pinch of ginger or cardamom for an extra flavor dimension in your Apple Crisp.
💡 Try This Next: Looking for variety? Explore yumytasty.com.
FAQs
Can I use frozen apples for apple crisp?
What spices go well with apple crisp?
How do you prevent apple crisp from getting soggy?
Is apple crisp better with oats or without?
What topping can I serve with apple crisp?

Apple Crisp A Delightful Autumn Dessert
Ingredients
Apple Filling
- 6 medium baking apples, peeled, cored, and sliced 1/4-inch thick (about 6 cups) such as Granny Smith, Honeycrisp, or Fuji
- 1/2 cup granulated sugar
- 1 tablespoon all-purpose flour
- 1 teaspoon ground cinnamon
- 1/4 teaspoon ground nutmeg
- 1 tablespoon fresh lemon juice
Crisp Topping
- 1 cup all-purpose flour
- 1/2 cup packed light brown sugar
- 1/2 cup old-fashioned rolled oats
- 1/2 teaspoon ground cinnamon
- 1/4 teaspoon salt
- 1/2 cup unsalted butter, cold and cut into small pieces 1 stick
Instructions
- Prepare Apples: Preheat your oven to 375°F (190°C). In a large bowl, combine the sliced apples, granulated sugar, 1 tablespoon of flour, 1 teaspoon of cinnamon, nutmeg, and lemon juice. Toss gently until the apples are evenly coated. Pour the apple mixture into an 8×8 inch or 9×13 inch baking dish, spreading them evenly.
- Make the Topping: In a separate medium bowl, whisk together 1 cup of flour, brown sugar, rolled oats, 1/2 teaspoon of cinnamon, and salt. Add the cold, cubed butter to the dry ingredients. Use your fingertips, a pastry blender, or a fork to cut the butter into the flour mixture until it resembles coarse crumbs with some pea-sized pieces of butter remaining.
- Assemble and Bake: Evenly sprinkle the crisp topping over the apple mixture in the baking dish. Place the baking dish on a baking sheet to catch any potential drips. Bake for 35-45 minutes, or until the topping is golden brown and the apples are tender and bubbling. If the topping browns too quickly, you can loosely tent it with aluminum foil.
- Cool and Serve: Remove the apple crisp from the oven and let it cool for at least 15-20 minutes before serving. This allows the filling to set slightly, preventing it from being too runny. Serve warm, perhaps with a scoop of vanilla ice cream or a dollop of whipped cream.
Notes
- Don’t Skimp on Apples: Use a generous amount of apples for a full, satisfying filling.
- Cold Butter is Key: Ensure your butter is very cold for the topping; it creates a more crumbly and crisp texture.
- Pre-bake if Needed: If your apples are particularly juicy, you can lightly pre-bake them for 10-15 minutes before adding the topping to reduce excess moisture.
- Resting Time: Allow the crisp to rest after baking. This allows the juices to thicken and prevents a runny filling.
- Spice it Up: Don’t be afraid to experiment with other spices like a pinch of ginger or cardamom for an extra flavor dimension in your Apple Crisp.